|
|
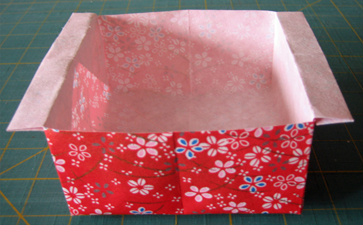
I know, looks rather like a box … but it does differ from others with those “handles” on two sides., and you wouldn’t put a lid on it. Easy to make and fun to use for a variety of purposes: a serving bowl, a mini trash receptacle, maybe a container for small supplies, especially if you need several of them and are looking for inexpensive solutions! This item must be made from a rectangular piece of paper, and a standard 8.5”x11” sheet works perfectly. You can use any type of paper, just base your choice on the intended use … maybe cardstock to hold heavier items, any sort of lightweight paper when that’s not an issue. I made the bowl pictured here from a rectangle cut from a pretty sheet of Japanese paper. While you can buy beautiful (and pricey) Japanese papers in beautiful designs, you can also find it at stores like Daiso or Lychee Tree if those happen to be in your area. They often have inexpensive packs of origami papers and sometimes larger sheets in a variety of designs. A sheet large enough to create three bowls only cost me $1.50, so the bowls were basically 50 cents each. And of course if you use a recycled piece of printer paper (or a bulletin or program from an event, pretty wrapping paper salvaged from a gift, a colorful magazine page, etc.) we’re talking pennies or no cost at all.
You can customize your finished piece for a specific purpose (fundraiser, special occasion or holiday, etc) by printing or drawing a design on your paper before folding. I made several of the one pictured here to 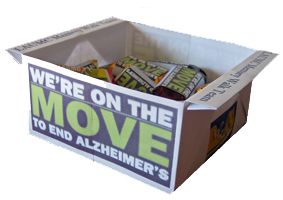 use at several events promoting our fundraising efforts for the Alzheimer’s Association Memory Walk on Treasure Island earlier this month. To come up with the design I did some experimenting and quite a bit of trial and error…basically folded a bowl, marked the areas where I wanted my designs, unfolded and mapped out where to place my graphics. (I use Adobe’s Photoshop Elements to do photo editing, and I’m a huge fan of Microsoft Publisher for my layouts and basically all the desktop publishing that I do.) In order to have the print visible on the tops of the “handles” I had to print on the back side of the paper as well as the front. You can’t see it in these photos but I also put a picture of our Memory Walk Team on the bottom of the bowl. use at several events promoting our fundraising efforts for the Alzheimer’s Association Memory Walk on Treasure Island earlier this month. To come up with the design I did some experimenting and quite a bit of trial and error…basically folded a bowl, marked the areas where I wanted my designs, unfolded and mapped out where to place my graphics. (I use Adobe’s Photoshop Elements to do photo editing, and I’m a huge fan of Microsoft Publisher for my layouts and basically all the desktop publishing that I do.) In order to have the print visible on the tops of the “handles” I had to print on the back side of the paper as well as the front. You can’t see it in these photos but I also put a picture of our Memory Walk Team on the bottom of the bowl.
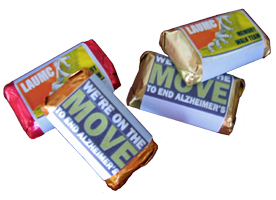 You’ll note that the contents of the bowl are customized as well — those are Hershey Miniatures with custom wrappers wrapped around the purchased candies. Totally sanitary as there is no need to unwrap the candy, just wrap the strip of paper around it with a little glue to adhere the ends on the bottom. If you want to give it a try, the custom wrapper should be about 1⅜” wide and 3⅛” long. These are simple and fun to use to personalize a treat for party favors, You’ll note that the contents of the bowl are customized as well — those are Hershey Miniatures with custom wrappers wrapped around the purchased candies. Totally sanitary as there is no need to unwrap the candy, just wrap the strip of paper around it with a little glue to adhere the ends on the bottom. If you want to give it a try, the custom wrapper should be about 1⅜” wide and 3⅛” long. These are simple and fun to use to personalize a treat for party favors,
birthdays and other holidays, fundraising events, thank-you’s, and more — comment with suggestions for these and the origami bowl! I have also made unique party invitations by printing the invite itself on a custom wrapper for a larger candy bar — definitely got teenagers’ attention! I’ll post a picture if I can find it.
So find some paper you’d like to use to try making a bowl, and I’ll post the how-to’s tomorrow, complete with photos!
Check my previous post for a discussion of this project — this post provides the instructions.
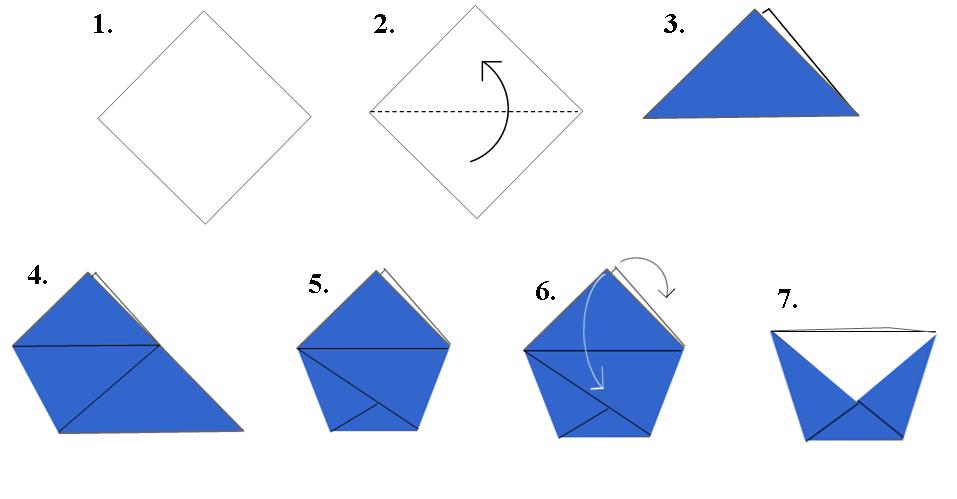
This is truly a simple set of folds; these diagrams will allow you to create a straightforward cup (at first without a lining). Following these I will provide a set of photos which show the process when adding the parchment liner. Here are the diagrams:
And the photos (the paper used in these photos is brown on the back (or “wrong”) side and yellow on the front (or “right” side). The parchment paper is a semi-translucent white (as in the Halloween photo in the initial post on this topic):
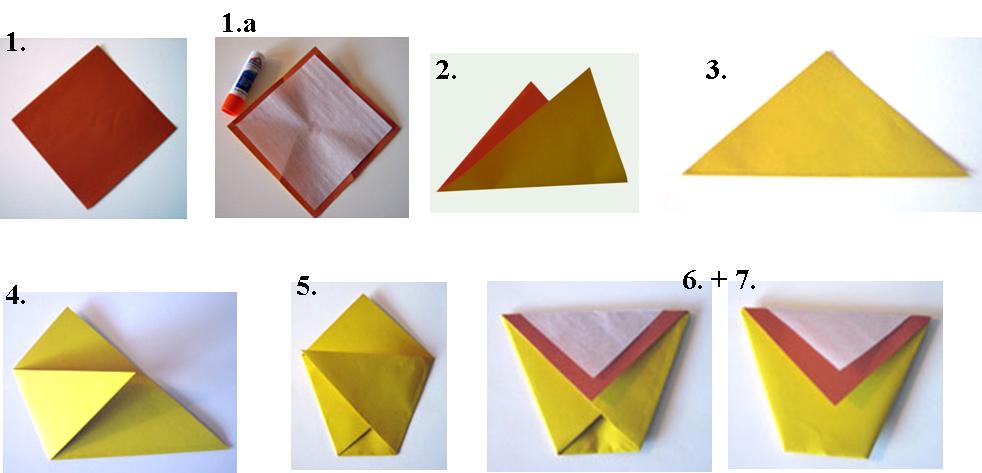
Briefly: 1. Place a square of paper (this one is 6″ on each side) with the wrong side up, positioned so that it looks like a diamond. 1a. Using a glue stick (available at any drug store, craft store, school supply store) put a bit of glue in the center of the paper, and then center a slightly smaller (about 1/2″, so in this case 5.5″ on a side)piece of parchment paper over the initial square and press to make it stick. I have found, at least with the silicone parchment paper I was using (purchased on Amazon from Golda’s Kitchen) that glue dots (available at craft stores like Michael’s) do not work — double sided tape probably would. Regular kitchen parchment paper that comes in rolls is fine to use, I just go a little crazy trying to cut it to size when it wants to curl up! 2. Fold the bottom point of the papers up to meet the top and crease the resulting bottom edge; the result should look like the photo in 3. 4. Now bring the bottom left corner up to meet the right edge and crease; the top edge of this folded section should be parallel to the bottom edge. 5. Do the same with the bottom right corner and crease. 6. & 7. Finally, fold the top triangles down on the front and back of the cup, and crease.
You may recognize this right away as that super-easy folded cup you learned as a kid! I knew there was a way you could fold a cup you could actually drink from but I wasn’t very interested until I found a clipping from an old Martha Stewart Magazine. It featured these packets made from glassine paper with parchment paper liners, filled with colorful melon balls and stacked in a row on a tray. 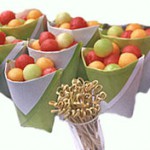 (See the complete photo and article at http://www.marthastewart.com/good-things/cups-of-plenty? ) I fell in love with the idea immediately and we used it for my daughter-in-law’s Bridesmaids’ Luncheon in July. They were a big hit! (See the complete photo and article at http://www.marthastewart.com/good-things/cups-of-plenty? ) I fell in love with the idea immediately and we used it for my daughter-in-law’s Bridesmaids’ Luncheon in July. They were a big hit!
While the glassine is very pretty we quickly discovered that it is very hard to find these days unless you want to order huge quantities directly from China. (If anyone knows a good source for small sheets of colored glassine in reasonable quantities, please submit a comment and share the info!).
Alternatives to Glassine
Of course you can use any paper to make these cups. For food applications, especially if the food is moist (like melon balls) or has some fat content (like cookies), it makes sense to use something which is water- or moisture-resistant. We ended up using Tyvek “paper”, which is not really paper at all but is used like paper. (You have probably r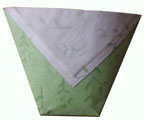 eceived Tyvek envelopes at some time through the mail – Tyvek is a synthetic, and a registered trademark of Dupont). I found some at a wholesale/retail paper store (Kelly Paper in Mountain View CA) and was happy to discover that you can use it in ink jet printers (NOT in laser jets!). To save money, I ordered some large sheets of the Tyvek and cut it to our desired size. I created a design that echoed the background design we had used on the wedding “Save the Date” magnets and printed it on to the Tyvek sheets. We then made the packets using squares of parchment paper for the liners. eceived Tyvek envelopes at some time through the mail – Tyvek is a synthetic, and a registered trademark of Dupont). I found some at a wholesale/retail paper store (Kelly Paper in Mountain View CA) and was happy to discover that you can use it in ink jet printers (NOT in laser jets!). To save money, I ordered some large sheets of the Tyvek and cut it to our desired size. I created a design that echoed the background design we had used on the wedding “Save the Date” magnets and printed it on to the Tyvek sheets. We then made the packets using squares of parchment paper for the liners.
Other Uses
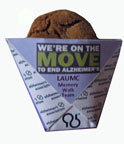
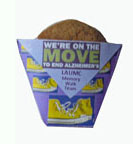
Since the wedding I have also found a couple other uses for these clever little cups. I am on a team that is fundraising for the Alzheimer’s Association and participating in the Memory Walk on Treasure Island this week. We sponsored a coffee hour at our church a couple weeks ago, and to get attention and create some buzz we made custom packets to hold the cookies we made for the event. I did some experimenting and created a template for our design, using Alzheimer’s Association logos as well as the “yellow shoe” logo that identifies our team. I printed on both sides of the paper we used so that one of the logos would appear on the triangle that gets folded over the top of the packet, and I’ve shown them below without the parchment paper liners (which we used) so you can see the graphics more clearly:
Don’t Forget Halloween!
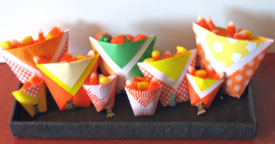
Finally, here’s an array of packets in varied sizes and designs, using papers that I had on hand in appropriate colors:
This blog is a celebration of paper crafts in general and paper-folding or origami in specific. My focus is on reasonably easy crafts with clear, illustrated instructions that do NOT assume that you know what you are doing! I am an enthusiastic student of origami (not an expert) and especially love projects that are practical and fun to use as gifts and gift emebellishments, favors, decorations, containers, scrapbook enhancements, etc.
My goal is to feature a new project every couple weeks and to share (and collect) ideas for how to use the results. I invite your feedback, suggestions, and (kind, constructive) critiques. Stay tuned, first project coming soon!
(By the way, if you were at my classes on the Royal Caribbean Mexican Riviera cruise in April/May, my apologies that this has taken so long! Blame my son and the wonderful big wedding he had here in late July. Thanks for visiting and let me know you’re out there…)
|
|

 use at several events promoting our fundraising efforts for the Alzheimer’s Association Memory Walk on Treasure Island earlier this month. To come up with the design I did some experimenting and quite a bit of trial and error…basically folded a bowl, marked the areas where I wanted my designs, unfolded and mapped out where to place my graphics. (I use Adobe’s Photoshop Elements to do photo editing, and I’m a huge fan of Microsoft Publisher for my layouts and basically all the desktop publishing that I do.) In order to have the print visible on the tops of the “handles” I had to print on the back side of the paper as well as the front. You can’t see it in these photos but I also put a picture of our Memory Walk Team on the bottom of the bowl.
 You’ll note that the contents of the bowl are customized as well — those are Hershey Miniatures with custom wrappers wrapped around the purchased candies. Totally sanitary as there is no need to unwrap the candy, just wrap the strip of paper around it with a little glue to adhere the ends on the bottom. If you want to give it a try, the custom wrapper should be about 1⅜” wide and 3⅛” long. These are simple and fun to use to personalize a treat for party favors,


 (See the complete photo and article at
  eceived Tyvek envelopes at some time through the mail – Tyvek is a synthetic, and a registered trademark of Dupont). I found some at a wholesale/retail paper store (Kelly Paper in Mountain View CA) and was happy to discover that you can use it in ink jet printers (NOT in laser jets!). To save money, I ordered some large sheets of the Tyvek and cut it to our desired size. I created a design that echoed the background design we had used on the wedding “Save the Date” magnets and printed it on to the Tyvek sheets. We then made the packets using squares of parchment paper for the liners.

