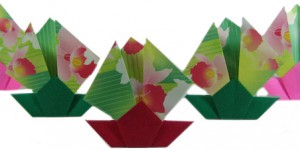
Celebrate Spring and oncoming Summer with these cheerful, easy to fold flowers, each with its own coordinated plant holder. For the flowers pictured above, I used small pieces of colorful papers 3″ square. The patterns shown here are from a pack of 300 sheets of floral print chiyogami, which I found at PaperJade.com (an excellent online store). The designs for both the flower and the plant holder are designs created by a number of modern origami artists. The idea to put them together was suggested by Michael LaFosse in his fun kit called “Origami Flowers”. (See end of post for a link)
Ready? Let’s get started and fold some of these…. We’ll start with the plant holder. You can start with a square sheet of paper the same size as you will use for the flower, or use one that is just a little bit smaller — it’s a matter of taste, you can play with the results and see what you like the most. If your paper is colored on one side and white (or pale) on the other, begin with the white side up; in any case, the side you want to show at the end should be face down. We’ll start here with paper that is a very pale pink on one side (facing up in the first picture) and deeper pink on the other:
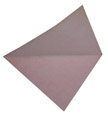
Orient your paper so the points are at the top and bottom and each side, then fold the bottom point up to the top. The result should look similar to the picture below: a triangle shape with your desired color showing:
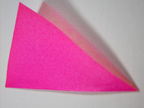
Next we are going to fold the left point over to the right point, make a nice sharp crease, and unfold:
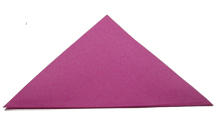

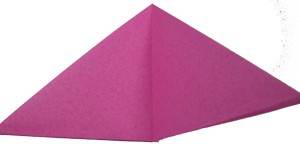
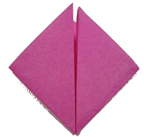
Now we are going to take the left point of the triangle and bring it up to meet the top point, folding it so that what was the bottom left edge now lies along the triangle’s vertical crease. Then do the same with the right point — bring it up to meet the top point so the bottom right edge lies along the traingle’s vertical crease. The result should look like the picture on the left below. Then we will take the entire model and turn it over, from left to right. The side facing up shoujld be smooth (no flaps), as shown in the photo below on the right:

Next take the lower left edge and fold it over so that it lies along the center vertical crease. Important: as you do so, left the flap on the back side swing out to the right. Do the same thing on theright side. See photos: 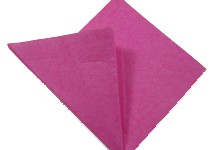
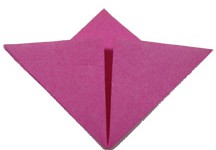
Our last two steps: first, fold the bottom point up to meet the top of the edges you just finished folding.
 Then turn the whole thing over (see photo).

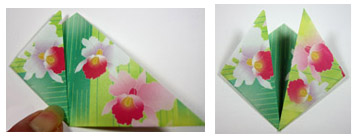
Note that the middle point that is higher than the rest of the unit is a double layer — next we will make the flower that will fit right in between those layers. Put the plant base or “vase” aside, and take the paper you are using for the flower. With the white or pale side up and the points of the square at the top and bottom and left and right (like a diamond shape), fold the bottom point up to the top and crease. Now you are looking at a triangle shape, as in the far left photo below. Now, as we did when folding the vase, take the left point of the triangle and fold it over to the right and crease (middle photo). Then unfold it so you have a triangle with a vertical crease in the middle, as in the far right photo below: 
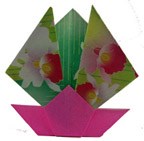
For our last two flower steps, we are going to take the left and right points and fold them up toward the top point, but not all the way. Bring them up just a bit off center — look at the photos below to guide you. There is no precise point to fold to here — it’s a matter of taste and what appeals to you. When you have folded up both points, your flower is done. For the final step, place the bottom point of the flower into the middle point of the plant holder or vase, as shown below.


For this and other more elaborate flowers, check out Michael LaFosse’s Origami Flower Kit:
